
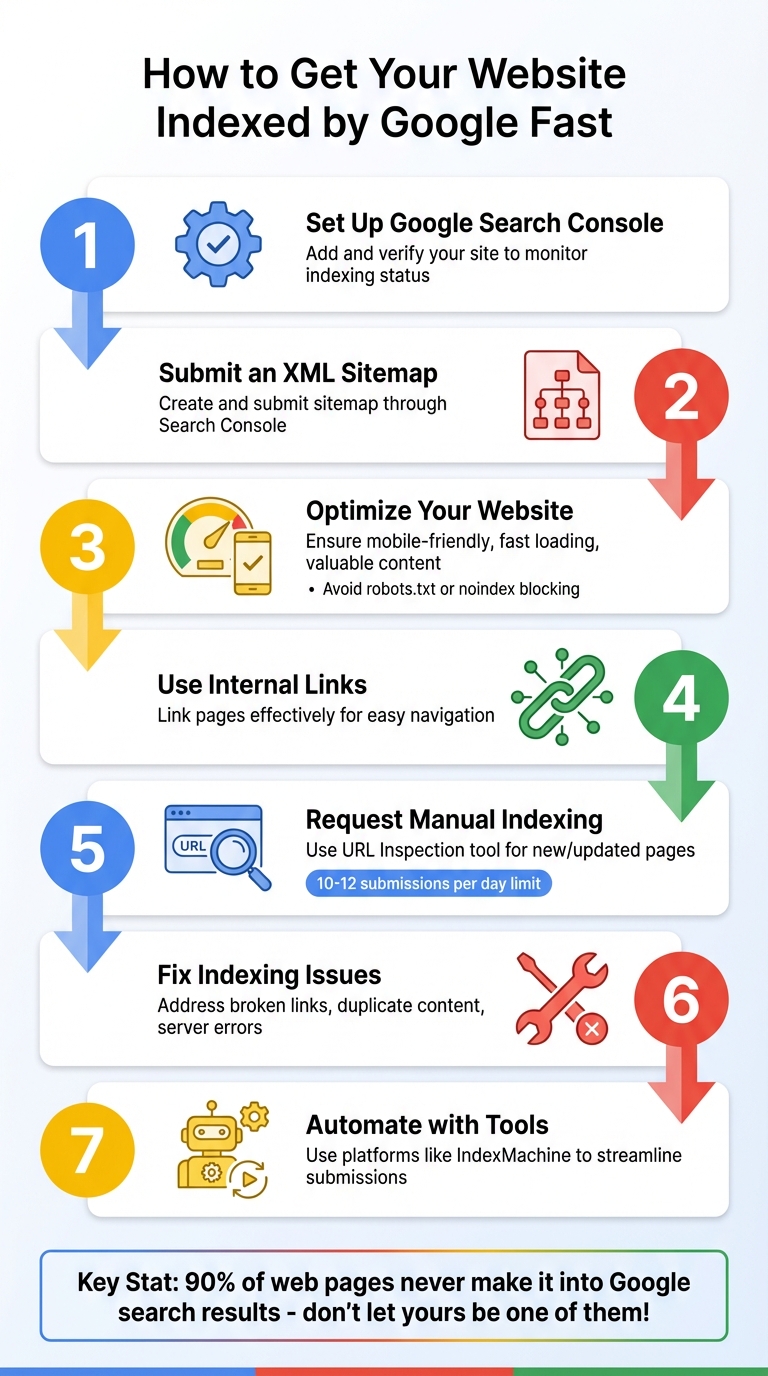
Want your website to show up on Google quickly? Here's how to make it happen:
- Set up Google Search Console: Add and verify your site to monitor indexing status and request manual indexing.
- Submit an XML Sitemap: Create a sitemap and submit it through Search Console to guide Google to your pages.
- Optimize Your Website:
- Ensure pages are mobile-friendly, load quickly, and provide valuable content.
- Avoid blocking pages with
robots.txtornoindextags.
- Use Internal Links: Link your pages effectively to help Google navigate your site.
- Request Manual Indexing: Use the URL Inspection tool in Search Console for new or updated pages.
- Fix Indexing Issues: Address common problems like broken links, duplicate content, or server errors.
- Automate with Tools: Platforms like IndexMachine can streamline URL submissions.
Key takeaway: Fast indexing requires a mix of technical setup, quality content, and regular monitoring. Follow these steps to ensure your pages appear in Google search results without delays.
Setting Up Google Search Console
Adding and Verifying Your Website
Google Search Console acts as your direct link to Google, helping you manage how your site appears in search results. To get started, open Google Search Console and click "Add property" or select an unverified property from the property selector. You'll then need to choose between two property types: Domain or URL Prefix, which we'll explain shortly.
Verification is essential because it confirms your ownership and gives you access to detailed search data. Once you've added your property, data collection begins immediately, though it may take a few days for the information to populate. Keep in mind, the verification token must stay accessible - if Google can't confirm it, you'll receive a notification and may lose access.
For verification via HTML file upload, download the provided HTML file and upload it to your site's root directory. After that, click "Verify" in Search Console. Alternatively, you can use the HTML tag method: copy the meta tag provided and paste it into the <head> section of your homepage's HTML. If you're using WordPress, you can add this tag through your child theme's header.php file or use a plugin like "Insert Headers and Footers."
If you're already using Google Analytics or Google Tag Manager, the process is even simpler. Just ensure the Google account you're using for Search Console has editing rights for your Analytics property or "Publish" or "Admin" permissions for Tag Manager. Adding multiple verification methods is a smart move - it ensures you maintain access even if one method stops working.
Once verified, the next step is choosing the right property type for your site.
Choosing Between Domain and URL Prefix Properties
When setting up your property, you'll need to decide between a Domain property or a URL Prefix property.
- A Domain property monitors your entire domain, including all subdomains (like
www.,m., orblog.) and protocols (http://,https://,ftp://). This option requires DNS verification through your domain registrar. - A URL Prefix property tracks only URLs that match the exact prefix you specify. For example,
https://www.example.comandhttp://example.comwould be treated as separate properties.
For most websites in the US, a Domain property is the better choice since it consolidates all your data in one place. However, if you need to track a specific subdomain separately, a URL Prefix property is a more tailored option.
Once your property is set up, you can start monitoring which of your pages Google has indexed.
Checking Which Pages Are Indexed
After verifying your site, you can quickly check which pages Google has indexed using several tools in Search Console.
- URL Inspection Tool: This tool provides detailed information about individual pages. Simply enter a full URL in the search bar at the top of any Search Console screen. If you see a status of "URL is on Google", the page is eligible to appear in search results, though it's not a guarantee that it will.
- Page Indexing Report: For a broader view, go to "Indexing" > "Pages" in the left-hand menu. This report shows which pages are indexed and which aren't, along with reasons for non-indexing. You can click on any row to see example URLs for specific issues and even filter results by sitemap to compare submitted pages with those Google has found on its own.
site:Search Operator: For a quick check, typesite:yourwebsite.comdirectly into Google. This will show you a list of indexed pages from your site.
These tools make it easy to identify and address indexing issues, ensuring your content is ready to appear in search results.
Creating Sitemaps and Improving Internal Links
Creating and Submitting an XML Sitemap
An XML sitemap serves as a guide for Google, listing all the pages you want to be indexed. Many content management systems (CMS) make this process easy by automatically generating sitemaps. For instance, WordPress (version 5.5 and later) includes built-in sitemaps, while platforms like Shopify, Wix, and Squarespace handle them automatically as well.
Once your sitemap is ready, submit it through Google Search Console. To do this, go to "Indexing" > "Sitemaps" in the left-hand menu, enter your sitemap URL (usually something like https://yourwebsite.com/sitemap.xml), and click "Submit." Google will start processing it right away, although it might take a few days to fully crawl all your pages, depending on your site's size and authority.
Make sure your sitemap only includes the pages you want indexed. This means leaving out thank-you pages, admin sections, and any duplicate content. Additionally, each sitemap should stay under 50,000 URLs and 50 MB uncompressed. If your site exceeds these limits, use a sitemap index file to organize multiple sitemaps.
After submitting your sitemap, strengthen its impact by improving your site's internal linking structure.
Building Better Internal Links
Submitting your sitemap is just the beginning. Internal links play a key role in helping Google's crawlers navigate your website. They ensure that all your pages are discoverable and prevent "orphan pages" - pages with no links pointing to them.
When adding new content, link it from high-authority pages, such as your homepage or main navigation. These pages tend to carry the most weight and can help new content get indexed faster. Use clear and descriptive anchor text for your links, so it's obvious what the linked page is about. Avoid vague terms like "click here" or "read more."
A strong internal linking strategy not only helps distribute authority across your site but also makes it easier for Google to understand the relationship between your pages and your overall content structure.
Adding Structured Data to Your Pages
Structured data provides extra context about your content using schema.org markup. While it doesn't guarantee faster indexing, it helps Google better understand your pages.
For example, if you're publishing an article, you can use the Article or NewsArticle schema. You can add structured data manually using JSON-LD code in your page's <head> section or simplify the process with plugins like Schema Pro for WordPress.
To ensure your structured data is implemented correctly, test it using Google's Rich Results Test tool. This step helps identify any errors and ensures your pages are optimized for rich search results.
Using URL Inspection and Manual Indexing Requests
Requesting Indexing with URL Inspection
Once your Search Console is set up, manual tools like the URL Inspection tool can help ensure your pages are reindexed quickly when updated. This tool allows you to request a recrawl for specific pages, speeding up the process.
Here's how it works: log into Google Search Console and select your website property. At the top of any screen, paste the full URL of the page you want to inspect. Google will then display the current indexing status of that page. If the page isn't indexed, click the "Request Indexing" button to add it to Google's crawl queue.
Google permits 10–12 submissions per property daily. As Search Engine Land explains:
"The Request Indexing button in the URL Inspection tool lets you ask Google to recrawl a specific URL".
It's important to note that submitting the same URL multiple times won't speed up the process. Use your daily quota wisely by focusing on your most critical pages.
In August 2024, Matt Sullivan, CEO of Torro, emphasized the value of this tool for new or updated content, stating that it:
"gives Google a little nudge"
to prioritize indexing. However, keep in mind that requesting indexing doesn't guarantee immediate results. Pages must still meet Google's quality and technical requirements to be indexed.
Finding Problems with Live URL Testing
Before submitting an indexing request, run a "Test Live URL" to identify any issues that could block indexing. This feature checks for problems like noindex tags, restrictions in robots.txt, or server errors.
When you click "Test Live URL", Google fetches the current version of your page, rather than relying on the last crawl. This is particularly helpful if you've recently fixed issues. It allows you to confirm that everything is in order before submitting the page for indexing.
If the test is successful, you'll receive a confirmation message, and you can request indexing directly from the test report. Once the issues are resolved, you can move forward with confidence and monitor the indexing status of your page.
Tracking Your Indexing Status
After submitting indexing requests, it's essential to track your progress. Use the Page indexing report in Google Search Console by navigating to "Indexing" > "Pages". This report shows which URLs are successfully indexed, which are excluded, and any errors that may have occurred.
Google for Developers points out:
"you must be an owner or full user of the Search Console property to be able to request indexing in the URL Inspection tool"
and emphasizes:
"requesting a recrawl multiple times for the same URL won't get it crawled any faster".
Once you've submitted your requests, patience is key. These steps work hand-in-hand with automated indexing strategies, helping you maintain your site's visibility effectively.
How to Index Pages on Google in Less than 2 Minutes!
Automating Indexing with IndexMachine

Automating your indexing process with IndexMachine takes the hassle out of manual submissions, making it faster and more efficient.
Connecting Your Website to IndexMachine
To get started with IndexMachine, the first step is linking it to your Google Search Console account. Once you sign in to IndexMachine, head to the integration settings. Here, you'll need to authorize access to your Search Console properties, enabling IndexMachine to handle URL submissions for you.
After granting access, add your domain by selecting it from your verified Search Console properties. Whether you're using domain properties or URL prefix properties, IndexMachine works with your existing setup. Next, configure your submission preferences by choosing the search engines you want to target - Google, Bing, or both.
Once your domain is connected and preferences are set, IndexMachine is ready to automate the submission process for your URLs.
How IndexMachine Automates Indexing
IndexMachine takes the manual work out of URL submissions by automating the entire process. Whenever you publish new content or update existing pages, the platform keeps an eye on your sitemap for changes. It then submits these updates directly to Google Search Console and Bing Webmaster Tools, ensuring your content reaches search engines without delay.
The platform adheres to submission limits, handling up to 20 URLs per day for Google and 200 URLs per day for Bing per domain. This automation ensures your new and updated content is consistently submitted, freeing you from the repetitive task of manual submissions.
Monitoring Progress with IndexMachine
Once your URLs are submitted, IndexMachine's dashboard provides a clear view of your site's indexing progress. It displays charts that break down pages into categories like indexed, pending, or excluded. Each page also includes detailed insights such as its coverage status, last crawl date, and any errors that might block indexing.
To keep you updated, IndexMachine sends daily reports summarizing your indexing activity. These reports highlight newly indexed pages and flag any issues that need attention. For instance, if the platform detects 404 errors on submitted URLs, you'll receive alerts so you can fix broken links before they hurt your site's visibility. This ongoing monitoring saves you from manually checking your site's indexing status every day, keeping you informed and in control.
Fixing Common Indexing Problems
Why Pages Don't Get Indexed
When pages aren't indexed, it's often due to technical barriers that prevent Google from accessing your content. These barriers might include noindex directives, incorrect configurations in your robots.txt file, server errors like 404, 403, or 5xx, orphan pages with no internal links, misconfigured canonical tags leading to indexing issues, or content flagged as duplicate or low-quality.
Zlata Verzhbitskaia, a digital marketer at SEO PowerSuite Ltd, emphasizes the importance of addressing these issues:
"Indexing issues may render your SEO efforts null - a page may be perfectly optimized and have a great UX, but it is worth nothing if Google doesn't see it. Unindexed pages will not get into SERPs and will not bring traffic and conversions."
Recognizing these potential problems is the first step in resolving them using tools like Google Search Console.
Finding Issues in Google Search Console
Google Search Console offers a range of tools to help you uncover indexing problems. The Page Indexing report categorizes pages as indexed, excluded, or having errors. Problematic URLs often show statuses like "Crawled – currently not indexed" or "Discovered – currently not indexed."
To dig deeper, use the URL Inspection and Crawl Stats reports to identify specific issues, such as noindex directives or server errors. The Manual Actions report reveals if your site has been penalized, and the robots.txt Tester ensures your robots.txt file isn't unintentionally blocking important pages.
These tools provide the insights you need to address indexing challenges effectively.
Which Fixes to Tackle First
Once you've identified the issues, it's time to prioritize your fixes:
- Remove noindex tags: Look for meta tags with "noindex" directives in the
<head>section of your pages and delete them if they're unnecessary. - Check your robots.txt file: Ensure it isn't blocking URLs that should be accessible to search engines.
- Redirect 404 errors: Use 301 redirects to guide users and search engines to the correct pages.
- Fix canonical tags: Verify that canonical tags point to the appropriate URLs to avoid confusion.
- Address orphan pages: Add internal links from your main navigation or related content to make these pages easier to find.
- Improve content quality: For pages labeled "Crawled – currently not indexed", enhance their content and strengthen internal links to signal their relevance to Google.
Conclusion
Achieving fast indexing requires a well-rounded strategy. Start by setting up Google Search Console - this tool is your go-to for monitoring indexing status and manually requesting indexing through the URL Inspection feature. Beyond that, submitting a well-optimized XML sitemap, strengthening internal linking, and incorporating structured data can help Google better understand your content.
Recent changes, like Google's 2024 updates, have slowed traditional sitemap submissions by 40%, making automation more important than ever. Tools like IndexMachine tackle this issue by instantly notifying search engines about updates to your site, cutting down the time it takes for new content to be discovered.
Technical issues are a major culprit behind indexing delays, responsible for 47% of such cases. Using tools like the Index Coverage report, URL Inspection tool, and Crawl Stats allows you to identify and fix problems like misplaced noindex tags, incorrect robots.txt configurations, or server errors before they hurt your site's visibility. Quick fixes ensure Googlebot can access your pages without unnecessary roadblocks.
It's worth noting that 90% of web pages never make it into Google search results, often due to overlooked technical issues or weak optimization efforts. By combining Search Console setup, sitemap improvements, structured data, and automation tools like IndexMachine, you can greatly improve your chances of fast and successful indexing.
The takeaway? Consistency matters. Regularly monitor your indexing status, address technical problems as they arise, and keep your sitemap updated with fresh content. This hands-on approach provides Google with a clear roadmap of your site, ensuring it's crawled efficiently and stays within your crawl budget.
FAQs
How do internal links help Google index my website faster?
Internal links are essential for helping Google find and explore the pages on your website more effectively. By creating a thoughtfully organized internal linking structure, you guide Google's crawlers through your site, making it easier for them to navigate and determine which pages hold the most value.
This approach not only accelerates the indexing process but also boosts your site's visibility in search results. A well-planned internal linking strategy ensures that every page gets the attention it deserves, allowing you to expand your website's reach and impact.
What can I do if my website pages still aren't being indexed by Google?
If your pages still aren't showing up in Google's index after following the suggested steps, here are a few additional actions you can take:
- Use the URL Inspection tool in Google Search Console to manually request indexing for specific pages.
- Look for crawl issues or restrictions, such as problems in your
robots.txtfile or meta tags that might be preventing Google from accessing key pages. - Double-check that your sitemap is accurate, up-to-date, and successfully submitted through Search Console.
- Boost your site's performance by improving page speed, ensuring it's mobile-friendly, and enhancing internal linking to help search engines navigate your site more effectively.
- Concentrate on publishing original, high-quality content and earning backlinks from trusted websites.
Remember, indexing can take some time, particularly for new sites or pages. If the problem continues, revisit Google's guidelines to confirm your site meets their requirements.
Why should I verify my website with Google Search Console?
Verifying your website with Google Search Console is a crucial step in managing your online presence. It confirms that you own the site and gives you access to tools that can enhance how your site appears on Google. Once verified, you can submit sitemaps, request quicker indexing for specific pages, and monitor how Google interacts with your site.
It also helps you spot and fix issues like crawl errors that could block your site from showing up in search results. This makes it easier to boost visibility and ensure your content gets indexed efficiently.